Comparing Bike Share Experiences: Carmel Bike Share

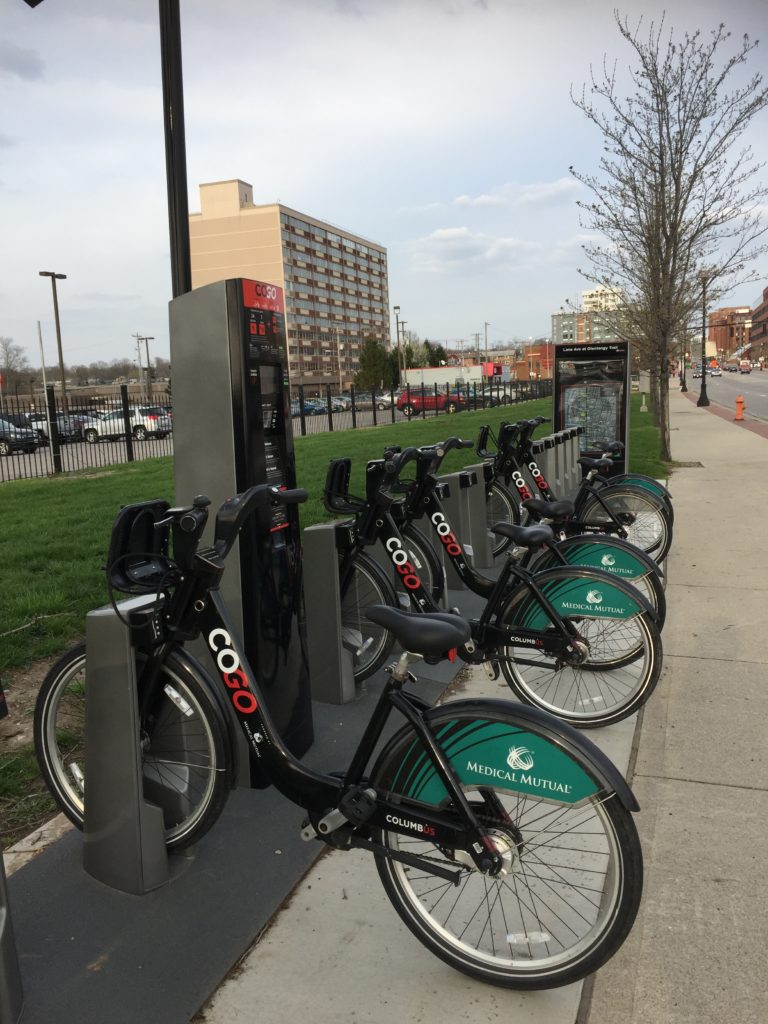
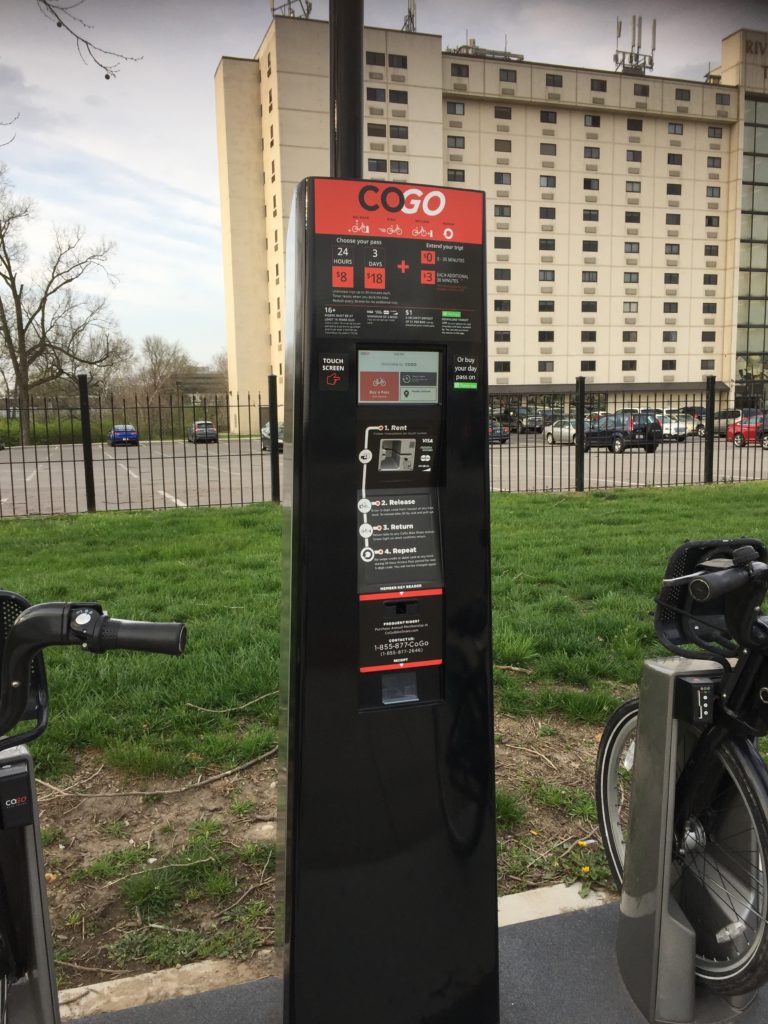
This is the second in a series of comparing the bike share programs in Columbus, Ohio, and Carmel, Ind.

Carmel Bike Share, Carmel, Indiana

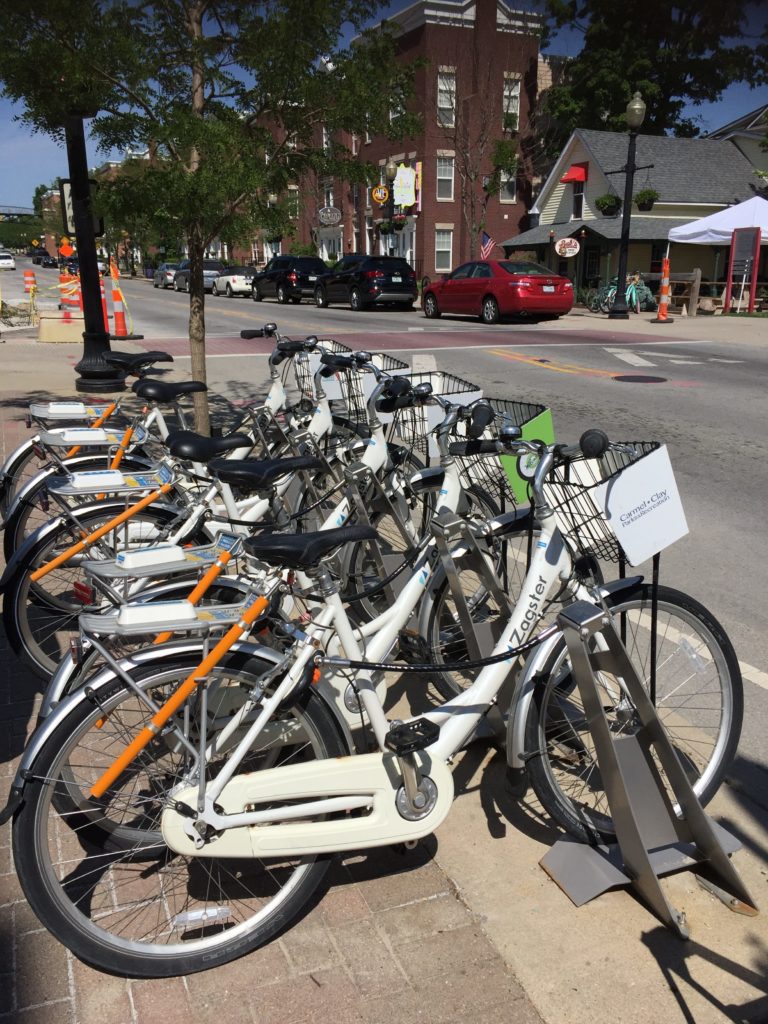
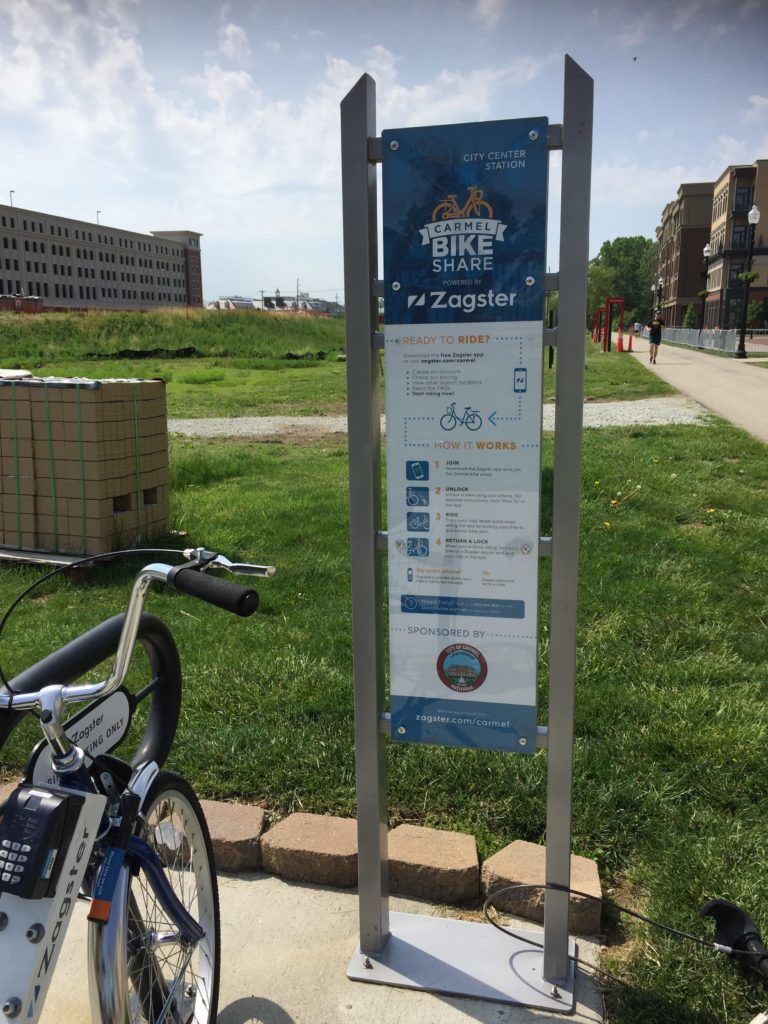
The bike share program in Carmel, Ind., is operated by Zagster, a company which offers more than 200 programs in 35 states. The setup is much different than other bike shares I’ve used over the years so I was very interested in trying out this program. Instead of a kiosk and a bike docking station used by programs in many major metropolitan cities, the Zagster setup consists of a set of locked bikes at a station with an information board explaining the program. Payments and locking mechanisms are controlled through a smartphone app.

Carmel Zagster Bike Share Program Station
A Carmel Zagster Bike Share Program Station

Program Summary

To use this type of bike share program, you need to install the Zagster app on your mobile device. If you don’t have the ability to download apps, you can arrange for payments and unlock bikes using text messages.

There are currently three payment choices:

  • Annual membership at $30 a year which includes free trips which are under an hour. After the first hour, users are charged $3 per hour up to $24 per ride.
  • Monthly membership at $15 per month which includes free trips which are under an hour. After the first hour, users are charged $3 per hour up to $24 per ride.
  • Pay-as-you-go which costs $1.50 every 30 minutes up to $24 per ride.

In all cases, if a bike is kept for more than 24 hours, users will be charged an over time fee of $24.

To use a specific bike, you find the bike’s number from the bike and enter it into the app. If the bike is available, you will be given an unlock code. This code is entered into the key pad on the bike. Once the bike is unlocked, you can remove it from the docking station. To return the bike to a station, you just park it and press and hold the lock button on the keypad until the light flashes. Then you find the orange tab on the lock and slide it down and place the docking cable into the port on the lock. Finally you tap “End Ride” in the Zagster app.

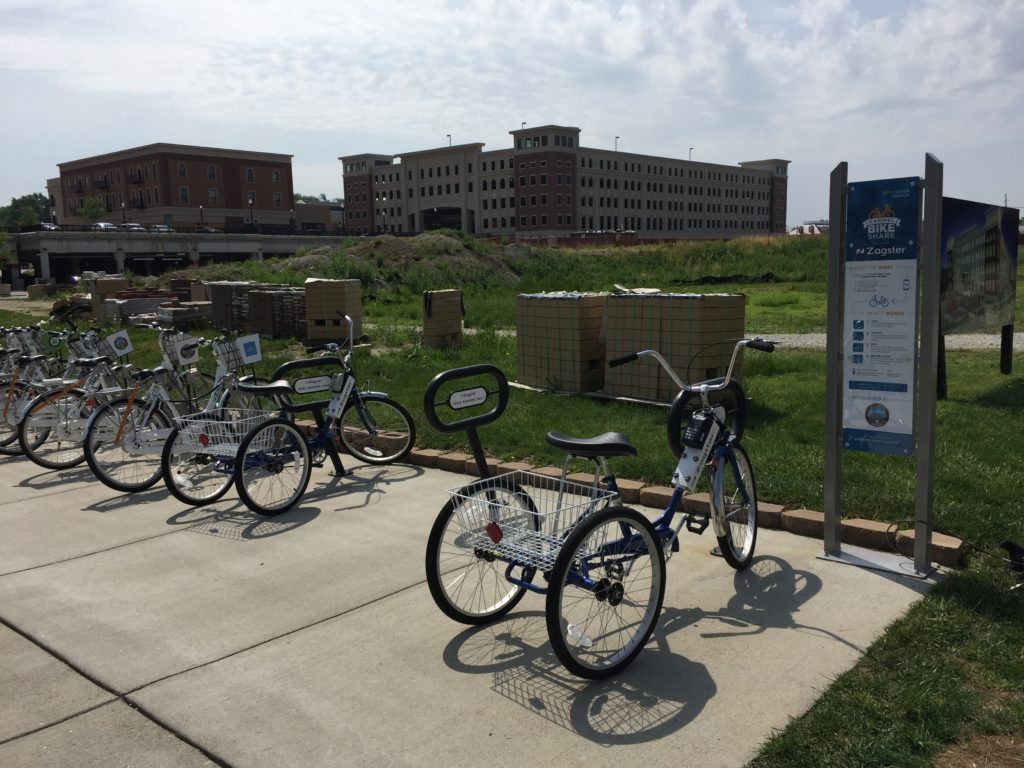
At the station in Carmel, there were two different types of bikes available: a “cruiser” and a “trike.” Both bikes had baskets.

Carmel Bike Share Program Information Board

My experience

Having only used the more traditional type of bike share program, I was a little hesitant in trying this one out. Fortunately this time, I was able to do so with my partner which was a great help and expanded our experience. For example, I had no problem downloading and using the app. But while my partner was able to download it, he could not get the app to give him the code to unlock the bike. So he used the text option to get the code which worked great. If he had not been with me, I probably would not have been able to see how the text function worked.

So we installed the app and went to a bike share station in the Carmel Arts & Design District. This is an example of how the map on the app looked for that area. You can see it is showing eight available bikes and no open spaces at the station colored orange which was on Main street and to the east of us. We also checked the one closer to us, and it showed seven available bikes with five open spaces.

Screenshot of Zagster app on iPhone.


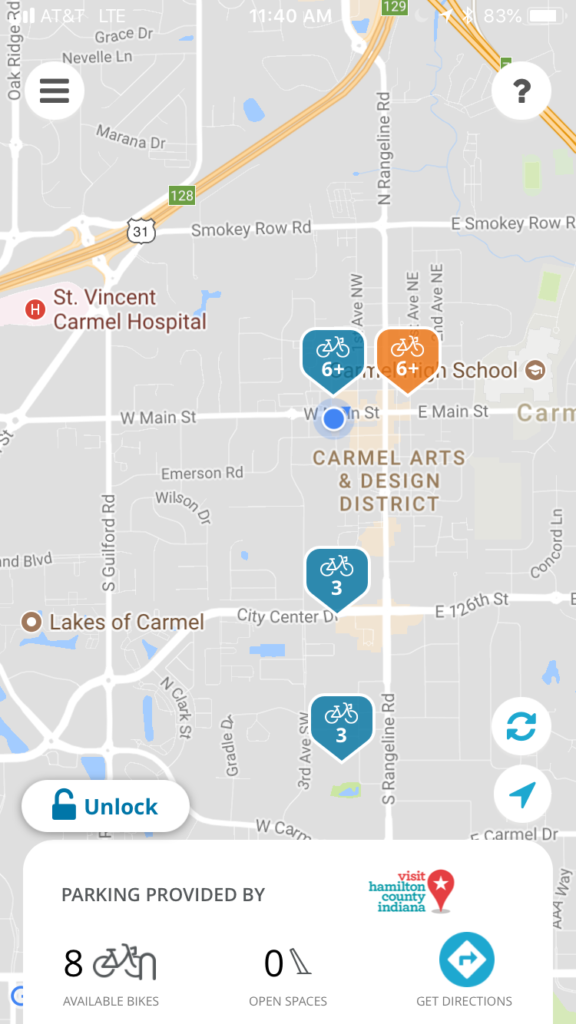
One thing we discovered right away was even though there were several bikes shown as available and several bikes locked into the dock, once we went to the screen to choose the bike and get the code, fewer bikes were actually available. I was wondering if this is because some of the bikes were still “checked out” on rides and only temporarily locked there by the users.

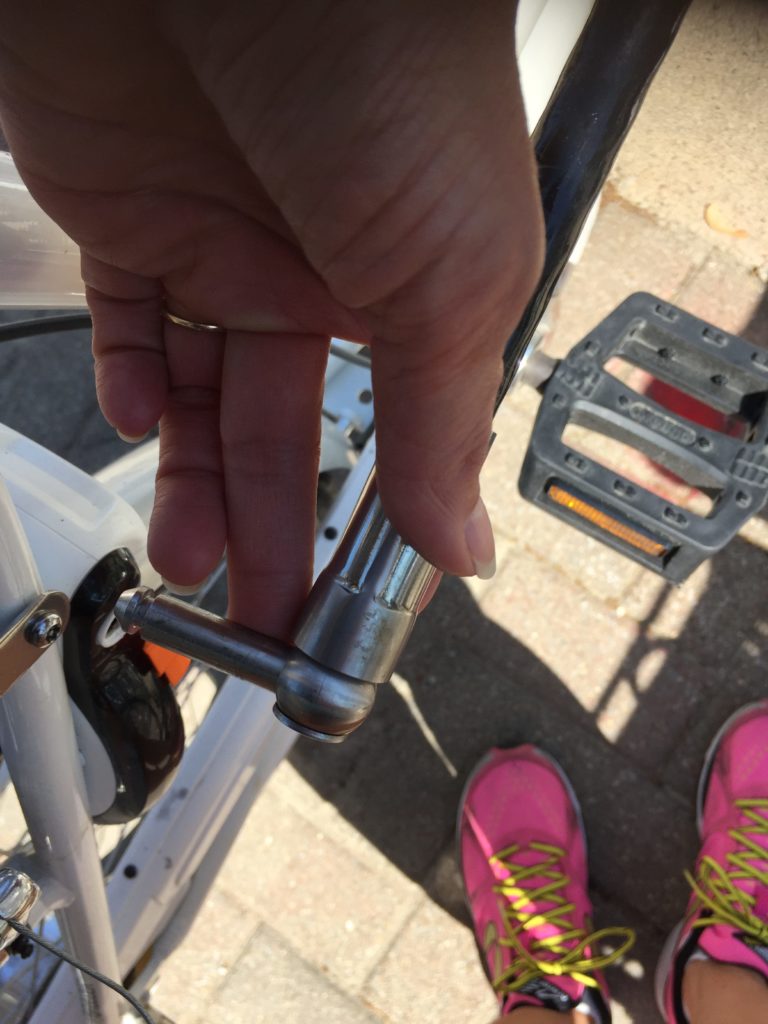
We eventually found two bikes, each of us bought a ride, and received an unlock code. The locking and unlocking process wasn’t obvious to us, but we did manage to eventually figure it out. Below is a photo showing how the bike is connected to the station.

Connection locking the bike to the docking station

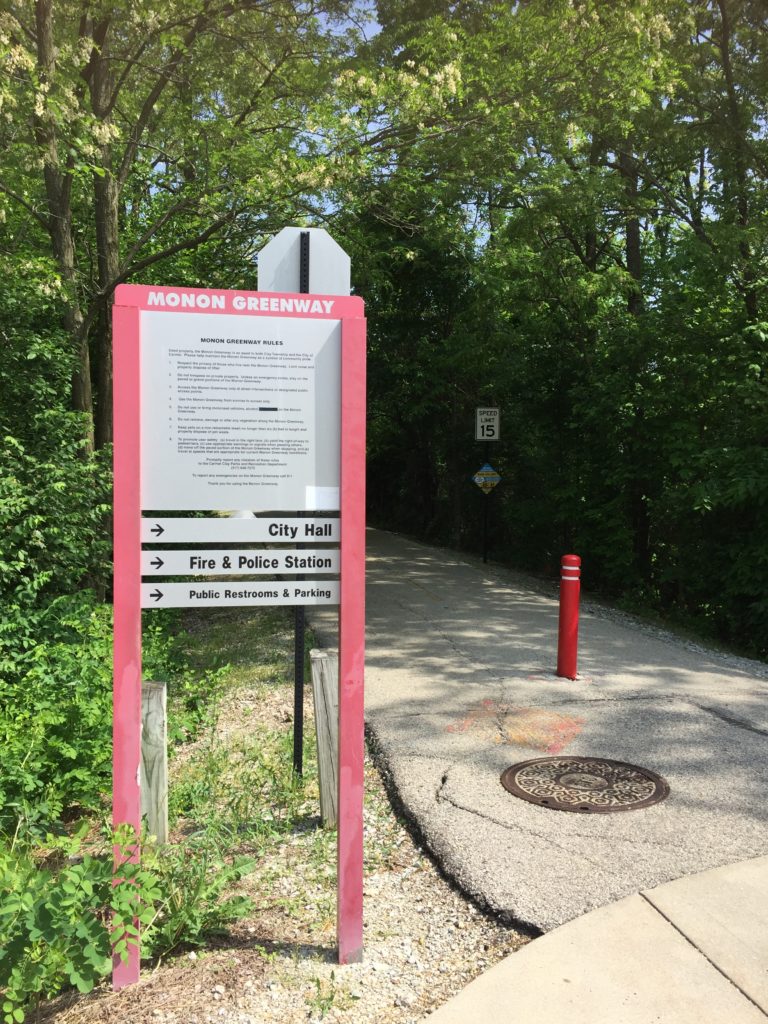
Once we got going, I was looking forward to a long ride since we didn’t have to worry about returning a bike in a specific amount of time. We could keep it out for a couple hours and just pay the total cost for that time. The station where we picked up the bike was right along the Monon Trail so we began biking south along that path. It didn’t take long before I realized the bike I had was making a strange and annoying noise. I tried recording it – you can watch it by clicking this link:  Bike Noise Video

So there was no way I could stand listening to that for two hours. Fortunately there was another station a little way down the path so we stopped there for me to return the bike, pay the $1.50, and pick another bike that I hoped would offer a more silent ride. After getting it unlocked and starting off again down the trail, I was happy to find out this one made no noises. After our ride we went back to the Arts & Design District and  returned the bikes.

Monon Greenway Bike Trail

While the access process took a little getting used to and we had that noise issue not only that time but also the next time we used the service, overall the experience was still positive. I would definitely use the Carmel Bike Share program again. Here’s my list of pros and cons from the perspective of a visitor, not a resident:

Pros

  • The best aspect of this system for me is that bikes do not have to be returned to a dock within a specific amount of time. This offers a lot more flexibility for users in choosing their routes.
  • The cost was very reasonable.
  • Bikes can be locked anywhere so users can stop along their ride to eat, shop, or explore. We saw users along the trail who had done this and were eating at restaurants along the trail.
  • Once I got a bike that worked, it was easy to ride.

Cons

  • The main issue for me was that twice we had problems with the bikes. While the cost to pay for another ride wasn’t much, it was annoying having to return the bike to a station and hope out of the few available bikes there, I would get one that would not make a noise.
  • The actual number of available bikes seems to be less than what appears in the docking station and on the app.
  • The setup and process to getting a bike takes some time to figure out.
  • A person cannot check out multiple bikes. So if you are riding with someone they need to get a bike on their own.

In comparing the two systems, I definitely prefer the Zagster bike share program. Yes there were some maintenance issues with the bikes and figuring out the process took some time. But not having to worry about getting a bike back to a station in 30 minutes made it definitely worth putting up with those other things. Also, the cost was very reasonable.

Carmel Bike Share Program Docking Station


Share

Comparing Bike Share Experiences: Columbus CoGo Bike Share

A couple months ago I was able to spend some time in Columbus, Ohio, and in Carmel, Indiana, a city just north of Indianapolis. Since I had some time to explore at night and on the weekends, I decided to try out the bike share programs in each community. Each offered a much different experience which I thought would be a good idea to share here. This post highlights my experience with CoGo Bike Share in Columbus. I’ll follow up with a post about the program in Carmel, Indiana.


CoGo Bike Share, Columbus, Ohio

The CoGo Bike Share in Columbus is operated by Motivate, a bike share company which partners with governments and brands to offer bike share services across North America. The setup in Columbus is similar to that offered in many other major metropolitan areas -a network of stations with bike docks and payment kiosks located throughout a given area.

Program Summary

Payment is made through either an annual subscription, a day pass, or a 3-day pass. Each type of payment covers a 30-minute ride after which the user must return the bike to a station or pay a fee for each additional 30 minutes.

CoGo Bike Share station in Columbus, Ohio

In Columbus, a membership is currently $75 while a day pass is $8 and a 3-day pass is $18. All include unlimited 30-minute rides, but if the bike is not returned in that 30 minutes, the $3 fee is applied. So basically to ride the bike for longer than 30 minutes with no extra fees, you would need to pick up a bike, ride it to another station, and return it in less than 30 minutes, and then arrange for your next 30-minute ride.

The bikes are locked in a dock at each station as shown in the photo above. So to unlock the bike for use, you use the code you are given when you pay for your day pass. To use another bike after your first 30 minutes, you just reswipe your credit card at the kiosk and request another code. If you have an annual membership, you are given a key which is used to unlock and access bikes.

The Transit app for mobile phones can also be used to provide maps of stations and availability of bikes. People can also use this app to purchase passes and generate codes.

My experience

Because I was staying in Columbus about 10 days, I figured I would try out the bike share program to see if I could use it to get around and at the same time get in some exercise. My hotel was conveniently located near the Olentangy Trail roughly a mile north of the nearest bike share station. So I walked to the station one night, bought a day pass, and took off down the trail.

Olentangy Trail Marker

My idea was to try to bike to German town via the trail since I prefer to follow a trail rather than ride in traffic. While the ride was great, as I neared the 30-minute mark, I realized this was a bad idea. There are no other stations near the trail until you get to the downtown area which I found was not a 30 minute ride for me. Part of the problem for me also was when I reached Goodale Street, there was no signage to tell me which way to take to get to the rest of the trail. So I did waste time at that intersection wondering what to do and wandering around somewhat. My phone was not really a big help either. So I turned around and tried to find the nearest station where I could drop off the bike and pick up a new one. I barely made it in time to the one at 3rd and Michigan which was about 5 or 6 blocks from the trail. After getting a new code and picking up a new bike, I headed back to the original station, dropped off the bike, and walked to my hotel along the trail.

CoGo Bike Share Pay Kiosk

This experience might be totally different for a resident or a person who loves biking in traffic or someone very familiar with Columbus. But because I was a visitor with minimal knowledge of the street system who prefers trails, I came away with this list of pros and cons:

Pros:

  • Relatively easy to figure out the pass system and buy a pass.
  • Also easy to get a code and unlock a bike.
  • From what I could tell, there were always plenty of bikes in all the docks.
  • The bike was easy to ride and in good mechanical condition.
  • I view the fact that there is even a bike share program available as a huge positive for Columbus.

Cons:

  • The stations were not located in areas near to where I prefer to ride.
  • Station locations and the 30-minute time limit minimizes the time which can be spent riding along off-road trails.
  • The 30-minute limit creates the need to strictly plan a route to ensure bikes are returned on time.
  • The 30-minute limit also minimizes the ability to stop and explore unexpected sights or attractions.
  • Definitely does not allow time for getting lost.

I would like to try it again if I was staying in the downtown area and compare that experience to the one I had this year. It seems like it might be a lot different since the bike network is more dense there. If I get a chance to do that in the future, I’ll try to follow up and post something about it.


Share

Bike Repair Stations

Bike Repair StationFortunately for bicyclists, public agencies are not only installing more bike trails, lanes, and shared use paths. Over the last few years many are also recognizing the need for support facilities and adding bike repair stations along these routes. The Fixit station shown in the photo above has an air pump to the left and a bike mounting/repair station on the right. This specific type of station includes the following tools which hang inside the station to assist in repairing your bike – a close up of these tools is shown below: Bike Repair StationTools

  • Philips and flat head screwdrivers
  • 2.5, 3, 4, 5, 6, 8mm Allen wrenches
  • 8, 9, 10, 11, 15, 32mm box wrenches
  • Tire levers (2)

This specific model, made and sold by Dero, is available in three styles and in many different colors and finishes including galvanized, thermoplastic, and powder coated. Their website offers CAD drawings, specifications, and other information. The company also publishes a map showing where their stations have been installed which might be helpful to bicyclists who are planning their routes. According to the map, bike repair stations have been placed in North and South America, Europe, Australia, and New Zealand. The company also offers other useful bicycle support structures such as shelters, lockers, racks, and signage.

Some agencies such as the Ventura County Fire Department (VCFD) have adopted an innovative idea of installing these stations at their own facilities. VCFD is taking advantage of National Bike Month to launch the installation of 16 repair stations at fire stations across the county. And they are hosting a Bike 'n' Ride event to celebrate. You can read more about the department's innovative support of their cycling community in this article in the Camarillo Acorn: "Fire stations across county to add bike repair services."

Share

Mapping the Accessible Path

Access map screenshot showing sidewalk steepness at 0.5%

Access map screenshot showing sidewalk steepness at 0.5%The Data Science for Social Good (DSSG) team, a group out of the University of Washington, has been involved in an effort to improve mapping of the pedestrian way. By making use of the work from the OpenSidewalks project, they created AccessMap – a trip planning tool for people with limited mobility. With this tool, people can find the most accessible path through a network of sidewalks connected by curb ramps and street crossings.

At this time, the tool has only been implemented in Seattle, but the group plans to expand to other locations. The data used for the project is a compilation of the following elements with sources noted:

  • Base map – OpenStreetMap (OSM)
  • Sidewalks and curb ramps – Seattle Department of Transportation
  • Street crossings – DSSG Team
  • Elevations – National Elevation Dataset, USGS

When a user clicks a sidewalk segment, the steepness or grade is displayed. The screenshot of the map above shows a sidewalk segment along 1st Avenue between Madison and Spring streets at a 0.5% grade. Sidewalk segments are also colored coded to indicate the grade with red exceeding the required 5%, yellow just below the requirement, and green meeting the requirement. Clicking a street crossing or crosswalk displays the steepness or running grade along with a "Yes" or "No" to indicate whether or not curb ramps are at the corners.

To plan a route using the map, the user types in their origin and destination in a manner similar to how other mapping programs work. The difference is that Accessmap has a drop down tool for the user to designate a limit for maximum uphill and downhill grade and the need to avoid construction and require curb ramps. Different mobility assisted devices such as wheelchairs or canes can also be designated. Below is an example of a planned route.

Planned route example on accessmap

Share

Newly Released Pedestrian Facility Selection Tool

PedestriansLast month, Austroads, the association of Australasian road transport and traffic agencies, released a Pedestrian Facility Selection Tool. According to their website, "the Pedestrian Facility Selection Tool is designed to help Australian and New Zealand practitioners select the most appropriate type of pedestrian crossing based on walkability, safety and economic outcomes." They have produced a User Guide and will be offering more information about the tool at a webinar scheduled for Tuesday, March 10, 2015. The webinar has already filled up, but the site indicates it will be recorded and offered on the website at a later date for viewing.

The tool can be used to assess the following types of pedestrian facilities:

 
  • raised platforms,
  • kerb extensions,
  • median refuges,
  • zebra crossings,
  • signals,
  • grade separation,
  • or combinations of these facilities.

According to the User Guide, the tool can also be used to assess the following:

  • "Puffin signals: the default signal type assessed by the tool, in which all pedestrian green phases are associated with pedestrians actually crossing
  • Wombat crossing (Australia): treat as Zebra with platform and adjust posted/approach speed if required"

You can try out the tool by clicking this link: Pedestrian Facility Selection Tool Link, then reading the necessary guidance and inputs on the page, reading the disclaimer, and clicking the link at the bottom of the page to indicate your acceptance of their terms and to access the tool. Below are screenshots showing the top and bottom sections of the tool.

Pedestrian Selection Tool Top Section


Pedestrian Selection Tool Bottom Section

For each option, "the tool then evaluates pedestrian and vehicle delay, safe sight distances, pedestrian level of service and, using default economic parameters developed for each Australian jurisdiction and New Zealand, calculates a benefit cost ratio." And if you are interested in learning more about the research undertaken to support and develop this tool, you can check out this report: Development of the Australasian Pedestrian Selection Tool.

Share

Using Stationary Bikes to Design Bike Trails

Stationary Bike ScreenAs I ride my bike through some of the grades, curves, and alignments along the bike paths in my area, I often wonder if the person who designed them rides a bike. Because I can't imagine anyone who rides regularly making some of the design choices I encounter. This got me wondering if the designer would have still made those same choices if they had to first ride their design before building it. Of course, up until recently this really would not have been possible. But thanks to newer technologies, this type of design tool could probably be implemented today, and here's how I'm thinking it could be done.

Let's say I am given a project with the goal of designing a bike facility. This route could consist of a shared use path or an on-road facility or a combination of both. I would begin with a fairly traditional approach of analyzing potential alignments. Then after choosing one or more proposed routes, I would arrange to have these alignments surveyed, bring them into a CADD program like Autodesk Civil 3D, and start developing my design for each alternative. At this point, the final alternative would be chosen by analyzing the route for impacts, costs, public opinion, access to specific destinations, property acquisition issues, and other typical factors we usually consider when finalizing a design. The downside of this approach is that the actual performance of the facility can never be assessed. It is just assumed that if the engineer followed the same design criteria for each alternative, they would all perform in a similar manner. However, based on specific environmental conditions or design choices, this might not necessarily be true. Then it is not until the route is built and the money is spent that the users realize there are some issues with the design. So how can we use newer technologies to overcome this inability to assess our design before actually building it?

During the stage in which we analyze the alternatives, we could export a 3D model of our design. Then we could upload it to a stationary bicycle that has a screen display of our route. The computer on the bike would then pick up the design parameters such as slopes, lengths of segments, curves, etc., and then program the bike to react to those parameters. So if I have designed too steep of a slope for too long of a distance, it will become very obvious as I actually bike that route. And while this could be done simply to analyze only the design of the path, other models such as terrain, trees, intersections, and buildings along with environmental conditions such as wind, sunlight, and perhaps even traffic flow could also be added to allow for a more detailed analysis of how the environment impacts the path. In addition to having the engineer bike their own design, potential users of the path who span a whole range of abilities could also bike the design and offer input and comments.

So how close are we to being able to do this? I suppose that is a question for the companies manufacturing stationary bicycles. I know they can take a route and project it on the screen as you can see in the photo at the beginning of this post. And I know they can adjust the bike for grade/resistance. But can they read essentially what would be metadata about the images being displayed and use that to control the grade? I don't know with the current bikes, but I am sure if it's not possible now, it could definitely be programmed to function in this manner. As for exporting a file from Civil 3D that could integrate with a stationary bike in this manner, I would think based on how innovative Autodesk has always been that company would have no problem figuring this out.

And even though my main thought in all this was to help us design better bike facilities, it also made me wonder if something like this could lead to a whole new industry for civil engineers in which we design virtual bike experiences for stationary bikes too! 


Share